DIY: Jewellery Tree
Add a personal touch to your bedroom or create the perfect gift for someone special!
Stylish looks for less
 Clothing33,030+ products
 Shoes14,696+ products
 Accessories1,179+ products
- See all48,905+ products
Last time we showed you how to create your very own DIY statement necklace using metal disks. So if you’re looking for a practical device upon which to hang your newly acquired jewellery you’re in luck because today, with the help of DaWanda, we’re going to show you how to create a stylish jewellery tree!
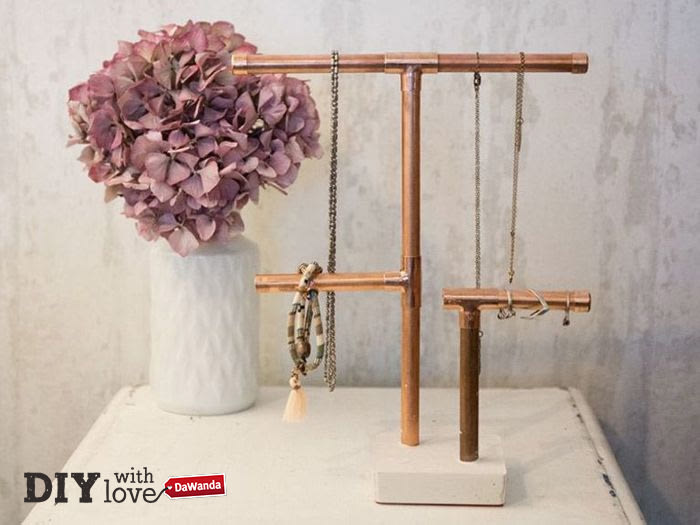
The end product will not only add a personal touch to your bedroom, it’s also the perfect gift for someone special this Christmas. Industrial designs are particularly on-trend at the moment. For this reason, we’ve decided to use copper and concrete both inside and out so that your tree looks as up-to-date as possible.
Materials
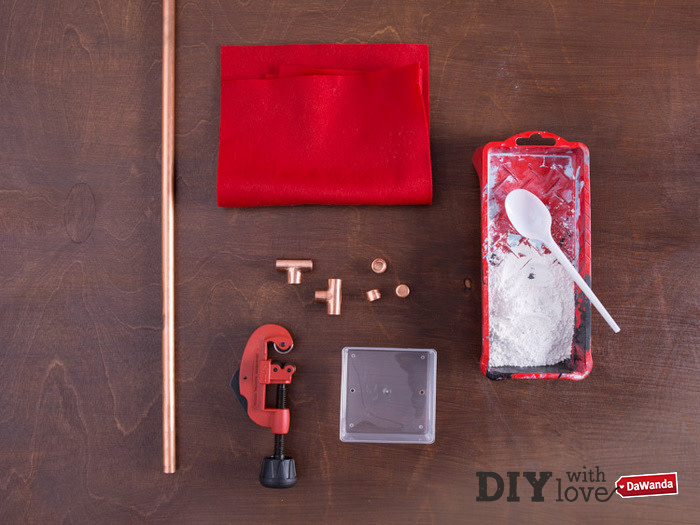
You'll need:
- copper pipe
- copper pipe cutter
- connecting pieces and end caps (made of copper)
- spackling paste
- plastic mould
- bowl
- stirrer
- vegetable oil
- crepe paper
The list of required materials might seem long but the good news is that most are readily available in a set at your local hardware store. If you’re unsure about which materials you need, simply ask an employee for advice.
The DIY process
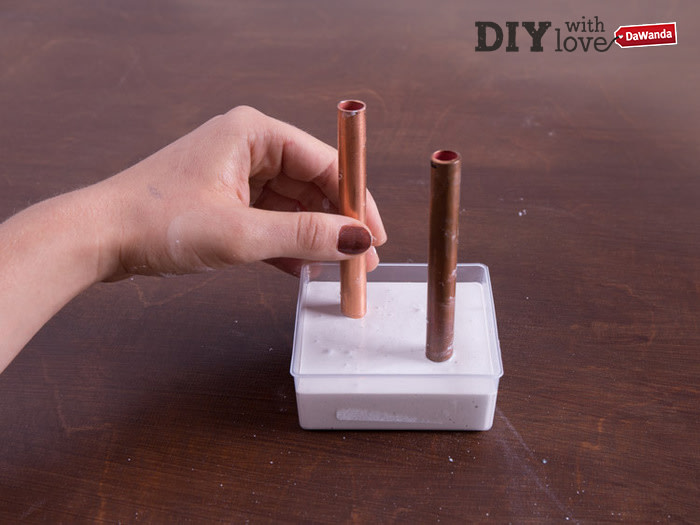
Before you begin to pour the concrete you should think about what you want your jewellery tree to look like. Cut the pipes to your desired length (you can be as creative as you like here). For the model pictured you will need seven copper pipes.
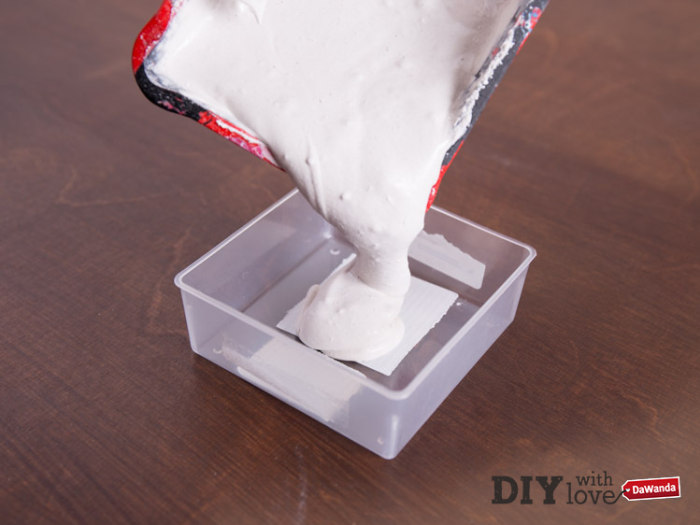
Don’t worry, you don’t need any previous experience in order to mix the spackle (detailed instructions are included in the packaging). In the end, the mixture should be viscous in consistency.

Grease your mould with crepe paper and pour the mixture in. This way it will be easier to remove when dry. Once you’re done pouring, tap the mould on the table several times so that you get rid of any small bubbles that might have formed.
Place the copper pipes that will act as the base for your jewellery tree in the mixture whilst it is still viscous. The mixture should take approximately one hour to dry but it may vary depending on the type you use, so just follow the instructions to find out exactly how long the process should take.
Once the foundation is dry you can get to work on assembling the rest of the pipes using the connecting pieces. The end caps should fit nicely on the end of the horizontal pipes, locking them in place. For additional stability, you can also attach the individual pieces to each other by applying superglue (just be careful!). And now for the final step - it’s a good idea to attach a piece of felt to the bottom of your tree so that the finished product won’t scratch any surfaces.